Per iniziare vediamo di localizzare il nome dell’app.
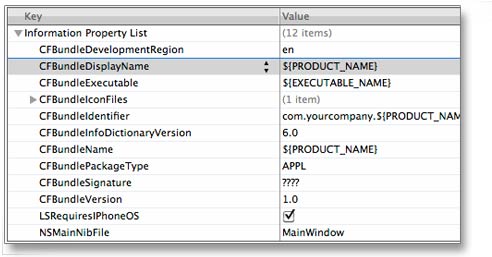
Il segreto è localizzare il valore della chiave CFBundleDisplayName contenuto nel file Info.plist.
La documentazione di Apple per questa chiave è la seguente:
CFBundleDisplayName (String - iOS, Mac OS X) specifies the display name of the bundle. If you support localized names for your bundle, include this key in both your information property list file and in the InfoPlist.strings files of your language subdirectories. If you localize this key, you should also include a localized version of the CFBundleName key.

If you do not intend to localize your bundle, do not include this key in your Info.plist file. Inclusion of this key does not affect the display of the bundle name but does incur a performance penalty to search for localized versions of this key.

Before displaying a localized name for your bundle, the Finder compares the value of this key against the actual name of your bundle in the file system. If the two names match, the Finder proceeds to display the localized name from the appropriateInfoPlist.strings file of your bundle. If the names do not match, the Finder displays the file-system name.
Inizialmente quando si crea una applicazione per iOS, xCode popola automaticamente le chiavi CFBundleDisplayName (“Bundle display name”) e CFBundleName (“Bundle name”) con ${PRODUCT_NAME} che rappresenta il nome assegnato al progetto.

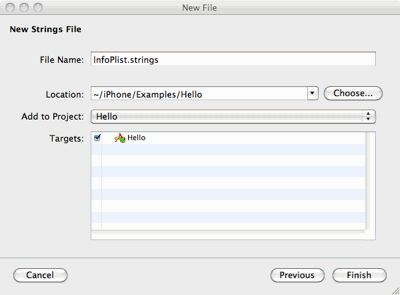
Per localizzare questa chiave abbiamo bisogno di creare il file InfoPlist.strings.
“Add -> New File…” e scegli string dal template delle risorse di MAC OS X ed essicurarsi di aggiungerlo al progetto:

Prima di localizzare per le altre lingue, scriviamo nel file la versione inglese:
“CFBundleDisplayName” = “Hello”;
“CFBundleName” = “Hello”;
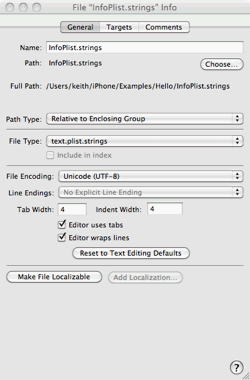
Per localizzarlo in italiano con il tasto destro del mouse sul file, scegliamo dal menu a tendina “Get Info” e clicchiamo “Make File Localizable” :

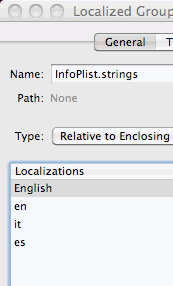
Partendo dal tab General clicchiamo “Add Localization” e scriviamo “en” (Inglese), “it” (Italiano) e “es” (Spagnolo), per esempio.

Una volta aggiunte tutte le localizzazioni, xCode lo rappresenterà in questo modo:

A questo punto modificheremo i files in base alla lingua:
it
“CFBundleDisplayName” = “Ciao”;
“CFBundleName” = “Ciao”;
es
“CFBundleDisplayName” = “Hola”;
“CFBundleName” = “Hola”;
Per quanto riguarda la localizzazione sarà sufficiente creare il file Localizable.strings e procedere allo stesso modo del file Info.strings.All’interno del file scriveremo tutte le coppie chiave=valore per la localizzazione
“K_GAME” = “gioco”;
“K_MUSIC” = “musica”;
All’interno del codice useremo l’istruzione NSLocalizedString(@”K_GAME”, @””) invece di NSString(@””) per i testi che devono essere localizzati.
Buon lavoro.
Ultimi Commenti